Virtual Servers in a Windows Clustering Environment
Exchange virtual
servers use the Windows clustering services, which are included in
Windows Server 2003, Enterprise Edition, and Windows Server 2003,
Datacenter Edition. These services control all aspects of Windows
clustering. Back-end servers require failover support and are typically
configured in a Windows clustering environment. Exchange Server 2003
uses the following Windows clustering features:
Resource DLL
This allows Exchange Server 2003 to communicate with the Windows
clustering services and customizes Exchange to provide Windows
clustering functionality.
Groups
An Exchange virtual server in a cluster is defined as a Windows cluster
group containing cluster resources, such as an Internet Protocol (IP)
address and Exchange Server 2003 System Attendant.
Resources
Exchange virtual servers include the Windows clustering services, such
as IP address resources, network name resources, and physical disk
resources. Exchange virtual servers also include their own
Exchange-specific resources.
Shared nothing architecture
Although all nodes in the cluster can access shared data, they cannot
access it at the same time. For example, if two physical disk resources
are assigned to node 1 of a two-node cluster, node 2 cannot access these
disk resources until node 1 fails or is taken offline, or until the
disk resource is moved to node 2 manually. This feature prohibits
dynamic load balancing in Windows clusters.
Virtual Servers in a Network Load Balancing Environment
Windows
Server 2003 servers can be clustered to provide network load balancing.
This is typically implemented on front-end servers, where load
balancing is a requirement. You implement network load balancing by
creating identical redundant virtual servers on all front-end servers
that are part of the network load balancing cluster. In this case, the
configuration of every server in the network load balancing cluster must
be the same; otherwise, clients may experience different behavior
depending on the server to which they are routed.
Exchange Virtual Server Requirements
An Exchange virtual server requires, at a minimum, the following resources:
Client computers
connect to an Exchange virtual server the same way that they connect to a
standalone computer running Exchange Server 2003. Windows Server 2003
provides the IP address resource, the network name resource, and the
disk resources. Exchange Server 2003 provides the System Attendant
resource and other required resources. When you create the System
Attendant resource, all other required and dependant resources are
installed.
Table 1 lists the Exchange Server 2003 components and their dependencies.
Table 1. Exchange Server 2003 Virtual Server Resources and Dependencies
| Component | Description | Dependency |
|---|
| System Attendant | Controls the creation and deletion of all the resources in the virtual server. | Network name Shared disk |
| Exchange store | Provides mailbox and public folder storage for Exchange Server. | System Attendant |
| SMTP | Handles relay and delivery of e-mail. | System Attendant |
| IMAP4 | Provides access to e-mail messages for IMAP4 clients (optional). | System Attendant |
| POP3 | Provides access to e-mail messages for POP3 clients (optional). | System Attendant |
| HTTP | Provides access to Exchange mailboxes and public folders via HTTP—for example, Microsoft Outlook 2003 Web Access (OWA). | System Attendant |
| Exchange MS Search Instance | Provides content indexing for the virtual server. | System Attendant |
| Message transfer agent (MTA) | Responsible for communication with X.400 systems and for interoperation with Exchange Server 5.5. | System Attendant |
| Routing service | Builds the link state tables. | System Attendant |
Note
There
can be only one MTA per cluster. The MTA is created on the first
Exchange virtual server. All additional Exchange virtual servers are
dependent on this MTA. |
Overview of POP3 Virtual Servers
POP3 allows a client to
retrieve a specific user’s mail from the server. POP3 clients can access
only their server inboxes; they cannot access other public or private
folders. POP3 does not provide full manipulation of mail on the server.
Messages can be left on the server if required, but typically, mail is
downloaded to the client and then deleted. POP3 does not send
e-mail—SMTP handles this.
You can configure a POP3
virtual server to grant or deny access to specific computers, groups of
computers, or domains. You can grant or deny access to a single computer
based on an IP address or by overriding POP3 access on a per-user
basis. A group of computers can be denied or granted access based on
their subnet address and mask. You can also control access to an entire
domain by specifying a domain name.
You can view a list of
currently connected users. You can immediately disconnect a single user
from this list without disrupting the service of other connected users
or denying new connection requests.
Installing
Exchange Server 2003 automatically installs a default POP3 virtual
server. You need to ensure that the default server supports the needs of
your specific POP3 clients.
Note
The
Microsoft Windows Server 2003 POP3 service is not installed on an
Exchange Server 2003 server. If you want to install Exchange Server
2003, then you need to uninstall the Microsoft Windows Server 2003 POP3
service and POP3 Web Administration (if installed). Exchange uses its
own Microsoft Exchange POP3 service to support POP3 clients. You need to
enable this service on your Exchange server before POP3 virtual servers
can start. |
POP3 Virtual Server Configuration
Exchange creates
the default POP3 virtual server with an IP address of (All Unassigned).
As a result, the Exchange server’s IP address identifies the POP3
service on the network. By default, incoming connections use TCP port
110, and Secure Sockets Layer (SSL) connections use port 995. You can
use the default IP address, TCP port, and SSL port, or you can assign a
different IP address from any available network card. If you have more
than one POP3 virtual server on an Exchange server, then each virtual
server must have a unique combination of TCP port, SSL port, and IP
address.
Note
To enable SSL on the POP3 virtual server, you must request and install a certificate. |
By default, any
POP3 client that supports basic authentication can access a POP3
virtual server. You can use selective authentication methods to restrict
access, or you can list only specific computers that are allowed to use
the service. To further enhance security, you can include or exclude
single computers, subnets, and entire domains from accessing a POP3
virtual server.
By default, a POP3
virtual server can accept an unlimited number of inbound connections. In
practice, there are limitations imposed by the finite resources of the
Exchange Server 2003 server. To prevent a server from becoming
overloaded, you can limit the number of connections made to the POP3
resource.
Messages sent by
an Internet client are stored in an Internet format, and no message
conversion occurs when a POP3 client reads the message. Messages sent by
a Messaging Application Programming Interface (MAPI) client are
converted from Microsoft Rich Text Format (RTF) to Multipurpose Internet
Mail Extensions (MIME) when read by a POP3 client. If POP3 clients use
UNIX to UNIX encoding (uuencode), then you can use uuencode instead of
MIME when messages are converted.
Before
a POP3 client can connect to a server, a mailbox-enabled user must be
created in Active Directory for the client. The POP3 client will also
need to be configured with account information that is necessary to
allow the client to connect to the POP3 virtual server. Overriding
server defaults at the user level allows you to support clients with
different needs that are accessing the same POP3 virtual server.
Overview of IMAP4 Virtual Servers
Like POP3, IMAP4 allows a
client to retrieve a specific user’s mail from the server. Also, IMAP4
can only retrieve e-mail from a user’s mailbox, and SMTP is used to send
e-mail. There are strong similarities in the ways that POP3 and IMAP4
virtual servers are configured and managed.
|
IMAP4 and POP3
are both Internet messaging protocols that allow users to access e-mail.
Neither can send e-mail; SMTP is used for this purpose. The protocols
differ in where users manipulate their messages. POP3 allows clients to
download mail from their inboxes on a server to the client computer
where messages are managed. IMAP4 allows clients to access and manage
their mail on the server. Unlike POP3 users, IMAP4 users can access
other public and private folders on the server if they have permission
to do so.
|
You can configure an
IMAP4 virtual server to grant or deny access to specific computers,
groups of computers, or domains. You can grant or deny access to a
single computer based on an IP address or by overriding IMAP4 access on a
per-user basis. A group of computers can be denied or granted access
based on their subnet address and mask. You can also control access to
an entire domain by specifying a domain name.
You can view a list of
currently connected users. You can immediately disconnect a single user
from this list without disrupting the service of other connected users
or denying new connection requests. You can configure an IMAP4 virtual
server to list all public folders. If you disable this feature, Exchange
lists only the client’s private folders.
Installing Exchange Server
2003 automatically installs a default IMAP4 virtual server. You need to
ensure that the default server supports the needs of your specific
IMAP4 clients.
Note
Exchange
uses its own Microsoft Exchange IMAP4 service to support IMAP4 clients.
You need to enable this service on your Exchange server before IMAP4
virtual servers can start. |
IMAP4 Virtual Server Configuration
Exchange
creates the default IMAP4 virtual server with an IP address of (All
Unassigned). As a result, the Exchange server’s IP address identifies
the IMAP4 service on the network. By default, incoming connections use
TCP port 143, and SSL connections use port 993. You can use the default
IP address, TCP port, and SSL port, or you can assign a different IP
address from any available network card. If you have more than one IMAP4
virtual server on an Exchange server, then each virtual server must
have a unique combination of TCP port and IP address.
Note
To
enable SSL on the IMAP4 virtual server, you must request and install a
certificate. If you need more information on SSL, refer to the Windows
Server 2003 help files. |
By default, any IMAP4
client that supports basic authentication can access an IMAP4 virtual
server. You can use selective authentication methods to restrict access,
or you can list only specific computers that are allowed to use the
service. To further enhance security, you can include or exclude single
computers, subnets, and entire domains from accessing an IMAP4 virtual
server.
By default, an IMAP4
virtual server can accept an unlimited number of inbound connections. In
practice, there are limitations imposed by the finite resources of the
Exchange Server 2003 server. To prevent a server from becoming
overloaded, you can limit the number of connections made to the IMAP4
resource.
Messages sent by
Internet clients are stored in MIME format, and no message conversion
takes place when IMAP4 clients read the messages. Messages sent by MAPI
clients are converted from RTF to MIME when read by IMAP4 clients.
Before an IMAP4 client
can connect to a server, a mailbox-enabled user must be created in
Active Directory for the client. The IMAP4 client will also need to be
configured with account information that is necessary to allow the
client to connect to the IMAP4 virtual server. Overriding server
defaults at the user level allows you to support clients with different
needs that are accessing the same IMAP4 virtual server.
Overview of NNTP Virtual Servers
NNTP defines a set of client and server commands used to access newsgroups.
Exchange Server 2003 uses NNTP virtual servers to enable Outlook users
to participate in online discussions over the Internet. You can also
enable users running client applications that support NNTP to access
newsgroup public folders on computers running Exchange.
Users can read and post
items to NNTP newsgroups, which are implemented in Exchange as public
folders. Items in newsgroups can be replicated to Usenet host computers
through newsfeeds. You can assign a moderator to a newsgroup to ensure that only approved articles are posted.
Exchange Server 2003
does not implement NNTP virtual servers by using a built-in Exchange
service (unlike POP3 and IMAP4). Instead it uses the Windows Server 2003
(or Windows 2000 Server) NNTP service. This service is designed to
support a stand-alone newsgroup server, and this makes it easy to create
group discussions. When you install Exchange Server 2003, the NNTP
service is enhanced. This enables the NNTP virtual server to interface
with other news servers through newsfeeds.
Using an NNTP virtual
server, you can administer newsgroup services from a centralized
location and control authentication and client connections. You can
create additional NNTP virtual servers to host multiple domains on a
single Exchange server.
You can create both
public and private virtual servers and configure different
authentication requirements on each. A public news server can be used,
for example, to give users quick and easy access to technical support
information.
NNTP virtual servers
can be used in a master/subordinate configuration. To create a master
server, you use the New NNTP Feed Wizard to define a remote server as a
subordinate server, rather than directly defining the server as a master
server.
In Windows 2000
Server, the NNTP service starts automatically. This is not the case in
Windows Server 2003, where you need to configure and start the service
manually. You can customize the default NNTP virtual server settings and
create and configure additional NNTP virtual servers.
You can cancel a posting, create a new newsgroup, and remove a newsgroup by sending control messages.
Control messages are received by the NNTP service and posted to one of
the special newsgroups that are automatically created to manage control
messages. These are the control.cancel, control.newgroup, and control.rmgroup newsgroups.
NNTP Virtual Server Configuration
Exchange creates the
default NNTP virtual server with an IP address of (All Unassigned). As a
result, the Exchange server’s IP address identifies the NNTP service on
the network. By default, incoming connections use TCP port 119, and SSL
connections use port 563. You can use the default IP address, TCP port,
and SSL port, or you can assign a different IP address from any
available network card. If you have more than one NNTP virtual server on
an Exchange server, then each virtual server must have a unique
combination of TCP port, SSL port, and IP address.
By default, an
NNTP virtual server can accept an unlimited number of inbound
connections. In practice, there are limitations imposed by the finite
resources of the Exchange Server 2003 server. To prevent a server from
becoming overloaded, you can limit the number of connections made to the
NNTP resource. You can also limit the length of time idle connections
remain logged on to the server. By default, Exchange disconnects idle
sessions after 10 minutes. You can also control the size of individual
articles that a user can post, or you can limit the total size of
articles that a user can post during a single connection.
You can define
expiration policies to limit how long articles are stored on a
newsgroup’s NNTP virtual server. An expiration policy can apply to a
single newsgroup or to all newsgroups on the virtual server.
You have a number of
ways of controlling access to an NNTP virtual server. You can specify
whether users can connect anonymously or whether they need to supply
valid usernames and passwords. If users connect over a public network,
you can encrypt the connection using SSL, assuming you have obtained the
necessary certificate. You can explicitly grant or deny access based on
the IP address of the client, and you can include or exclude single
computers, subnets, and entire domains. You can also specify the users
who are permitted to administer a virtual server by restricting access
to administrative tasks on the NNTP server by specifying the accounts
that are authorized to modify server settings.
By default,
Exchange enables basic authentication on NNTP virtual servers. To
enhance security, you can use SSL with basic authentication to encrypt
all information. If you use basic authentication on NNTP virtual
servers, anonymous authentication is disabled. If you want to use both
anonymous and basic authentication, then you need to create additional
NNTP servers. Integrated Windows authentication is also available but is
not a practical option in some newsgroup scenarios.
You create a new newsgroup
by using the Use New Newsgroup Wizard. The NNTP service creates the
directory for the newsgroup automatically, and you have the option of
specifying a moderated newsgroup. You can use newsfeeds
to distribute articles among multiple computers. Newsfeeds can
distribute newsgroup articles between servers within your organization,
and between your organization and the Internet through a Usenet host.
You can use master, subordinate, and peer newsfeeds to distribute the
newsgroup load among servers. A server can have both a subordinate feed
and a peer feed.
A virtual directory
is a public folder store that enables you to store newsgroup files on
multiple disk drives. This can improve the performance of a heavily used
drive and can provide more storage. Virtual directories also enable you
to change the physical location of the directory without changing the
name of the newsgroup.
Overview of HTTP Virtual Servers
The
World Wide Web uses the HTTP protocol to define how messages are
formatted and transmitted and the actions Web servers and browsers take
in response to HTTP commands. Web Distributed Authoring and Versioning
(WebDAV) is an extension of the HTTP version 1.1 protocol that allows an
HTTP client to retrieve and manipulate information held in the
Information Store.
Exchange Server 2003 supports HTTP virtual servers and WebDAV to provide the following functions:
Document access
HTTP and WebDAV support a collaborative environment in which users can
edit documents, protect data, collect resources in a common folder, and
move or copy files.
E-mail access
HTTP and WebDAV can be used to access mailboxes and messages, notify
users that new e-mail has arrived, and allow users to move, copy, or
delete e-mail on the server.
Application access
HTTP and WebDAV are standards-based application layer protocols that
allow access to mailboxes and public folders through a unique Uniform
Resource Locator (URL). This allows custom applications to retrieve data
directly from the Information Store.
Exchange provides
support for WebDAV through HTTP virtual servers. Internet Information
Services (IIS) converts the folder contents displayed by the HTTP
virtual server displays into Web pages and sends them to a user’s
browser. The default HTTP virtual server (known as the Exchange virtual
server) is created by IIS, and you must administer this server using IIS
Manager. However, if you create additional HTTP virtual servers in
Exchange, then you should administer them using Exchange System Manager.
A default HTTP virtual
server is automatically installed, configured, and enabled when you
install Exchange Server 2003. It provides users with access to public
and private folders. Users can access data by using http://server_name/public to access to public folders and http://server_name/exchange/mailbox_name to access mailboxes.
HTTP Virtual Server Configuration
Exchange creates the
Exchange virtual server with an IP address of (All Unassigned). As a
result, the Exchange Server 2003 server’s IP address identifies the HTTP
service on the network. By default, incoming connections use TCP port
80, and SSL connections use port 443. You can use the default IP
address, TCP port, and SSL port, or you can assign a different IP
address from any available network card. If you have more than one HTTP
virtual server on an Exchange server, then each virtual server must have
a unique combination of TCP port, SSL port, and IP address.
The
default HTTP virtual server authentication settings vary between server
roles, depending on whether the Exchange server is a front-end server
or a back-end server. For example, Integrated Windows Authentication is
enabled by default on a back-end, but not on a front-end, additional
HTTP virtual server. Basic authentication is enabled by default on both
back-end and front-end servers, and anonymous access is disabled. If you
enable anonymous connections, this allows HTTP clients to access
resources without specifying a Windows user account. You can also
configure an HTTP virtual server to use SSL encryption, provided you
first obtain and install the required certificate.
To prevent a server
from becoming overloaded, you can limit the number of connections the
HTTP virtual server accepts. You can also limit the length of time that
idle connections remain logged on to the server. By default, Exchange
Server 2003 limits the number of incoming connections to 1,000 and
disconnects idle sessions after 60 seconds.
Creating Additional HHTP Virtual Servers and Virtual Directories
You can create
additional HTTP virtual servers to provide for a number of different
collaboration scenarios. For example, you might want to use Integrated
Windows Authentication on the default virtual server, but also to
provide users outside your organization with information about your
company. In this situation, you can enable anonymous access on a
separate HTTP virtual server.
You can use
additional HTTP virtual servers to supplement access to folders that the
default Web site in IIS provides. For each virtual server that you
create, you must define one virtual directory as the root of the server
for publishing content. You can create additional virtual directories to
publish content that is not contained within the server’s own directory
structure. For example, the virtual directory can provide access to a
public folder (or to a mailbox) on a remote domain.
When you create a new
HTTP virtual server, you must provide access to a public folder or
public folder tree, and to an SMTP mailbox domain in order to configure
the server’s root. You can change the default e-mail domain of the HTTP
virtual server, or you can create additional virtual directories to
provide access to mailboxes in multiple domains.
When you create a
virtual directory, you provide users with access to the contents of a
public folder through a URL that takes the form http://virtualserver/public, where virtualserver
is the DNS name of the virtual server. You can also access a published
directory through Microsoft Internet Explorer or through any client that
supports the industry standard HTTP and WebDAV protocols. You can use
Microsoft Office to create and save documents directly into an HTTP
directory through a feature called Web Folders that lets you work with
files and folders that are on a Web server, just as you would with files
and folders in My Computer or Windows Explorer.
Controlling Access to an HTTP Virtual Server
HTTP virtual servers allow you to support a collaborative authoring environment.
When you collaborate on confidential material, you need to control
access to the data. You may, however, also want users outside of your
organization to access public information. In this case, you can use
separate HTTP virtual servers and specify different access settings on
each.
You can configure read,
write, and browse permissions on a virtual directory. When you set these
permissions, all users are granted the same permissions to access the
folders or mailboxes that the virtual directory specifies. Virtual
directory settings are general restrictions imposed by IIS and do not
override permissions set on the user’s account to access mailboxes and
public folders.
By default, users can access private mailboxes using a URL in the form of http://server_name/exchange/mailbox_name
after a standard Exchange installation and setup is complete. If you
create a new mailbox store, a different URL is automatically assigned to
it. This URL is based on the virtual directory name.
OWA
A default HTTP
virtual server is installed and configured during the Exchange Server
2003 installation process to support OWA. You can use OWA to configure
Exchange so users can access e-mail, calendar information, shared
applications, and any content in the public information store by using a
Web browser. To enable your users to access OWA from the Internet, your
Exchange Server 2003 server must have an Internet connection, a public
IP address, and a registered domain name.
OWA can be disabled
for the Exchange organization by stopping the HTTP virtual server. It
can also be disabled on a per-user basis.
Overview of SMTP Virtual Servers
SMTP
is the Internet standard for transporting and delivering electronic
messages. Exchange Server 2003 expands the SMTP service to give
administrators greater control over the routing and delivery of messages
and to provide secure access and channels for managing the service.
When Exchange
Server 2003 is installed, it automatically installs, configures, and
enables a default SMTP virtual server. You can alter settings on this
server to configure security options, message delivery options, and
message filtering. You can configure the SMTP virtual server and the
SMTP Connector to support other messaging systems and to relay mail for
IMAP4 and POP3 clients.
SMTP works closely with
DNS, and you can add Mail Exchanger (MX) records in DNS to support your
SMTP virtual servers. You can configure SMTP to pull e-mail, which is
queued at your Internet Service Provider (ISP), through a dial-up
connection.
If you have
different groups of users with varying security requirements or
message-size needs, then you may want to create additional SMTP virtual
servers. You can also, for example, configure one virtual server to
handle Internet e-mail, while another handles internal e-mail. Where you
support POP3 and IMAP4 clients, you need to permit open relaying for
these clients. You do not want to permit open relaying for your entire
Exchange organization because this permits the propagation of junk mail.
While you can use discretionary access control lists (DACLs) on a
single SMTP virtual server to manage this situation, it is often safer
and easier to create an additional virtual server for clients that
require relaying.
Configuring an SMTP Virtual Server
The display name (for
example, Default SMTP Virtual Server) and the IP address and TCP port
combination identify an SMTP virtual server. You can also select the IP
address that will be associated with the virtual server; by default,
this is (All Unassigned). The default SMTP port is TCP port 25. Multiple
virtual servers can use port 25, but you must assign a different IP
address to each virtual server.
You
can configure the SMTP virtual server to authenticate incoming
connections and also to provide the authentication credentials required
by a receiving server. Three authentication methods are available:
anonymous access, basic authentication, and Integrated Windows
Authentication. You can choose to use one, two, or all three methods.
The default setting deactivates anonymous access on SMTP virtual
servers. To allow anonymous access, you must manually disable
authentication on the virtual server.
If basic authentication is enabled, you can require that all clients use Transport Layer Security (TLS)
encryption to connect to an SMTP virtual server. TLS is developed from,
and is similar to, SSL. This option secures the connection and encrypts
the clear-text password sent by the basic authentication method.
However, TLS is intended for a point-to-point SMTP connection where both
parties know that the other supports TLS. It should not be used if
clients access through the Internet. You need to obtain a certificate to
implement TLS encryption.
You can grant or deny
access to an SMTP virtual server to specific users or groups. By
default, all IP addresses can access an SMTP virtual server. You can set
restrictions by specifying a single IP address, a group of addresses
using a subnet mask, or a Windows domain name.
You can configure an SMTP
virtual server to limit the number of messages sent in a single
connection. You can improve system performance by allowing the use of
multiple connections to deliver messages. You can also configure message
size limits and limit the number of message recipients.
Practice: Enabling and Starting the POP3, IMAP4, and NNTP Services
In this practice, you
enable and start the services that are disabled by default. You then
check the status of the corresponding virtual servers and start them, if
required.
Exercise 1: Start the Disabled Services
By default, the default
POP3, IMAP4, and NNTP virtual servers are disabled. To enable them, you
need to start the relevant services. You can choose the automatic
startup type if you want the service to start any time you restart the
Exchange server. Choosing the manual startup type lets you decide when
you want the service to start. Typically, the manual setting is used for
troubleshooting. In this practice, we configure all three services on
Server01 to start automatically.
Note
On
your practice, two-computer network, you perform this exercise on
Server01 while logged on as a domain administrator. In a production
network, the Principle of Least Privilege
mandates that you should use the runas utility while logged on as an
ordinary user to a client computer that has the appropriate
administrator tools installed. |
To enable and start the disabled service, perform the following steps:
1. | Open the Services console on Server01.
|
2. | Right-click Microsoft Exchange POP3 and click Properties. The Properties dialog box for the service is shown in Figure 1.
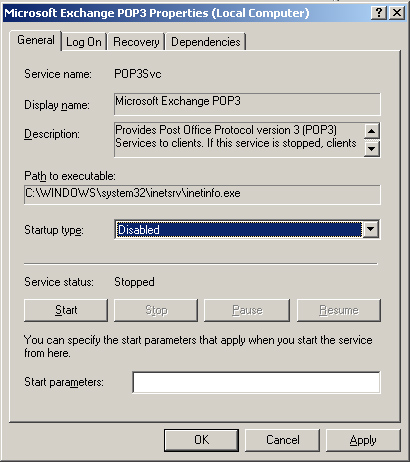
|
3. | In the Startup Type drop-down list, select Automatic.
|
4. | Click Apply.
|
5. | Click Start.
|
6. | Click OK.
|
7. | Repeat the same procedure for the Microsoft Exchange IMAP4 service and the Network News Transport Protocol (NNTP) service.
|
Exercise 2: Start the POP3, IMAP4, and NNTP Virtual Servers
You cannot assume that
the virtual servers will start when you enable and start the services.
You must check the servers and start them as necessary.
Tip
It
is wise to check that virtual servers have started any time that you
restart the Exchange server. Even when the services are set to start
automatically, the virtual servers do not always start on reboot. |
To start the POP3, IMAP4, and NNTP virtual servers, perform the following steps:
1. | Start Exchange System Manager.
|
2. | Navigate to Administrative Groups\First Administrative Group\Servers\Server01\Protocols\NNTP.
Note If
Exchange System Manager is not configured to display Administrative
Groups, right-click TailSpinToys (Exchange), click Properties, select
the check boxes beside Routing Groups and Administrative Groups, and
then click OK. |
|
3. | Right-click
Default NNTP Virtual Server. If Start is unavailable (but Stop is not),
then the server has started. If not, then click Start.
|
4. | Expand
IMAP4 and POP3 on the console pane, and repeat the same procedure for
Default IMAP4 Virtual Server and Default POP3 Virtual Server.
|
Note
You
can also determine whether or not a virtual server has started by
examining its icon. If you see a white X inside a red circle, then the
server is stopped. If you see two black bars inside a white circle, then
the service is paused. |
Exercise 3: Assign IP Addresses to Virtual Servers
To assign IP addresses, perform the following steps:
1. | Start Exchange System Manager.
|
2. | Navigate to Administrative Groups\First Administrative Group\Servers\Server01\Protocols\IMAP4.
|
3. | Right-click Default IMAP4 Virtual Server. Click Pause.
|
4. | Right-click Default IMAP4 Virtual Server again. Click Properties.
|
5. | On the General tab, in the IP Address drop-down list, select the IP address of Local Area Connection.
|
6. | Click Advanced to view the virtual server configuration, as shown in Figure 2. Click OK.

|
7. | Click OK to close the Properties dialog box.
|
8. | Right-click Default IMAP4 Virtual Server. Click Pause.
|
9. | Repeat the same procedure for the POP3, NNTP, and SMTP virtual servers.
Tip If
you try to use the same procedure to configure the default HTTP virtual
server (the Exchange virtual server), it will not work. Remember that
the default HTTP virtual server was created using IIS, and you must use
IIS Manager to configure it. |
|
10. | Open the Internet Information Services (IIS) Manager console.
|
11. | Expand Server01\Web Sites, right-click Default Web Site, and click Properties.
|
12. | On the Web Site tab, in the IP Address drop-down list, select the IP address of Local Area Connection.
|
13. | Click OK to close the Properties dialog box. |